
JupyterLab
JupyterLab is an open-source web-based interactive development environment primarily used for data science, scientific computing, and machine learning. It allows users to create and manage interactive documents that combine live code, visualizations, equations, and narrative text in a single workspace. These documents are saved with the .ipynb extension, which stands for IPython Notebook, reflecting its origins in the IPython project.
Unlike traditional text editors or IDEs, JupyterLab provides a highly flexible interface that lets users open multiple notebooks, terminals, text files, and data viewers simultaneously in tabs or split screens. It supports numerous programming languages, with Python being the most common, and offers extensive integration with libraries for data analysis, plotting, and machine learning, such as NumPy, pandas, Matplotlib, and TensorFlow.
Key features of JupyterLab include:
- Interactive code execution: Run code in real-time, see outputs immediately, and modify code cells independently.
- Rich media support: Embed images, videos, interactive plots, and LaTeX equations directly within notebooks.
- Extensible interface: Customize the environment with extensions like version control, debugging tools, or additional language kernels.
- Collaboration and sharing: Notebooks can be shared with others, exported to multiple formats (HTML, PDF, Markdown), or run on cloud platforms like Google Colab or Binder.
Overall, JupyterLab is a powerful tool for data exploration, analysis, and presentation, combining code execution and documentation into a single cohesive platform.
Installing JupyterLab
Installing JupyterLab on Windows
- Install Python (Make sure to check mark the
Add Python X To Pathin the installation window) - Go to the CMD and install jupyterlab using
pip install jupyterlab
Installing JupyterLab on Linux-based OS (Ubuntu)
- Go to the terminal
- Install Python using
sudo apt-get install python3 - Install pip using
sudo apt-get install python3-pip - Install jupyterlab using
pip3 install jupyterlab
- Install Python using
Installing JupyterLab on MacOS
- Go to the terminal
- Install jupyterlab using
pip3 install jupyterlab
- Install jupyterlab using
In some operating systems, such as Windows, the pip command is aliased to pip3.
Alternatives
*If you are having issues with installing JupyterLab, use, use Visual Studio Code or any environment that supports that
Installing JupyterLab (Isolated)
Install Python and create a virtual environment for JupyterLab. Activate the environment, install JupyterLab, the Python kernel, and register the environment with JupyterLab as “RPi Python.”
sudo # Run the command with administrator privileges
apt # Raspberry Pi OS package manager
update # download the latest package information
sudo apt updatesudo # Run the command with administrator privileges
apt # Raspberry Pi OS package manager
install # Install software
python3-venv # Create Python virtual environments
python3-pip # Python package installer
-y # Automatically answer “yes” to prompts
sudo apt install python3-venv python3-pip -ypython3 # Run Python 3
-m # Run a Python module
venv # Python’s virtual-environment module
~/jupyter-env # Create the environment in your home directory
python3 -m venv ~/jupyter-envsource # Execute the activation script in the current shell
~/jupyter-env/bin/activate # Activation script for the environment
source ~/jupyter-env/bin/activatepython # Python executable from the activated environment
-m # Run pip as a Python module
install # Install a package
–upgrade # Upgrade pip to the latest available version
pip # Python’s package manager
python -m pip install --upgrade pip
pip3 # Python’s package manager
install # A command to download and install libraries from PyPI (Python Package Index
jupyterlab # JupyterLab web-based development environment
ipykernel # allows Python to run as a kernel in Jupyter
pip3 install jupyterlab ipykernelpython # Run Python
-m ipykernel # Run the IPython kernel module
install # Register the environment with Jupyter
–user # install the kernel for the current user
–name # internal name used by Jupyter
rpi-jupyter # name assigned to this kernel
–display-name # name displayed in JupyterLab
“RPi Python” # user-friendly name shown in JupyterLab
python -m ipykernel install --user --name rpi-jupyter --display-name "RPi Python"Running JupyterLab
You can use the interactive interface using the JupyterLab command in the terminal or command line interpreter. That command takes different switches, and the one that we will use is lab (You may need to elevate privileges). You may need to close the terminal or CMD before running the jupyterlab command because new environment variables are added (the easiest way to refresh them is to simply close the terminal or CMD and open it again).
jupyter # Main Jupyter command-line tool
lab # Subcommand to launch the JupyterLab interface
(Host) jupyter labor
python # Starts the Python interpreter
-m # Tells Python to run a module as a script, instead of running a .py file
jupyterlab # The name of the Python module being executed
(Host) python -m jupyterlab
...
...
...
[C 2023-09-23 13:06:53.906 ServerApp]

    To access the server, open this file in a browser:
        file:///Users/pc/Library/Jupyter/runtime/jpserver-5633-open.html
    Or copy and paste one of these URLs:
        http://localhost:8889/lab
        http://127.0.0.1:8889/lab
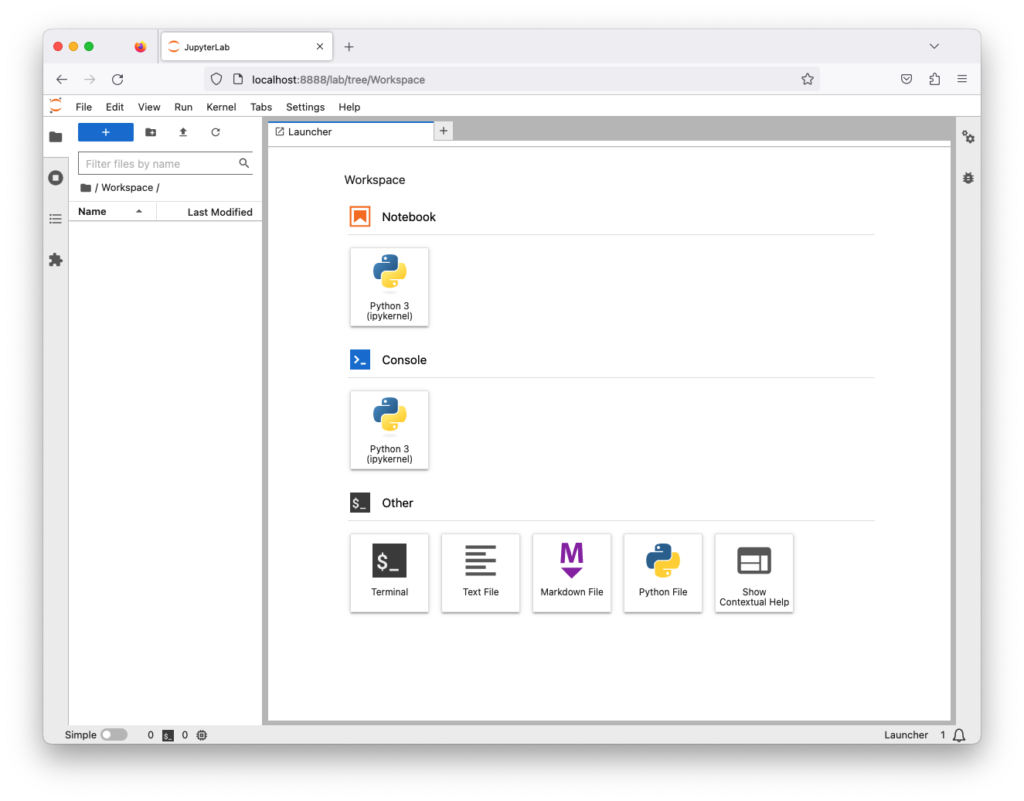
The browser will open and show the interactive interface. If the browser did not open, you can open the browser and open the URL shown from the terminal or command line interpreter
If you want JupyterLab accessible to all devices in the network
jupyter # Main Jupyter command-line tool
lab # Subcommand to launch the JupyterLab interface
–ip=0.0.0.0 # Listen on all network interfaces
–no-browser # Do not start the browser
jupyter lab --ip=0.0.0.0 --no-browserCreate a Jupyter Notebook
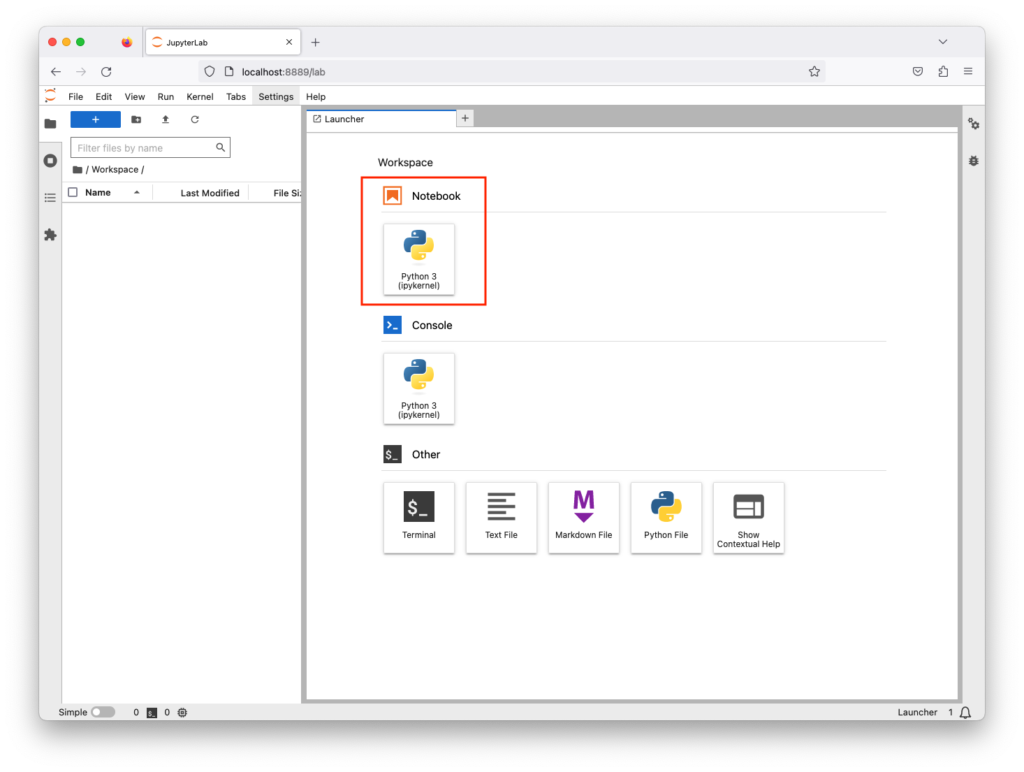
You can create a notebook by clicking on File, then New, then Notebook. Or, you can click on the following icon
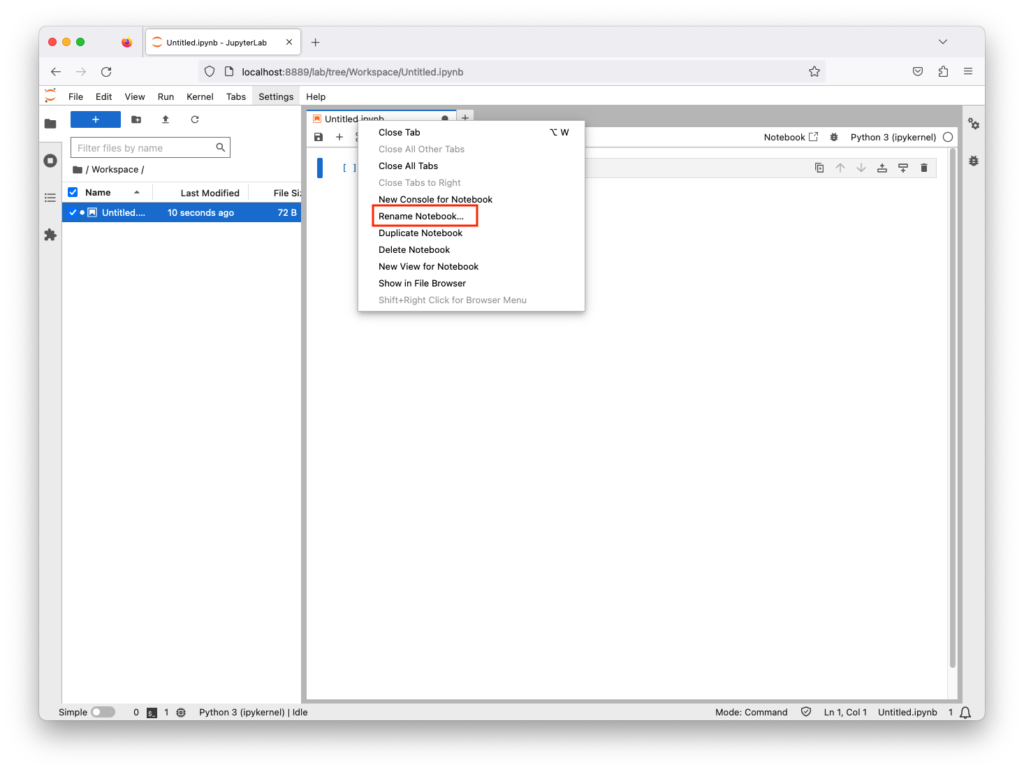
You can change the newly created file name by right-clicking on the file tab, then Rename Notebook
In the notebook file, make sure that code is selected and type print("test")
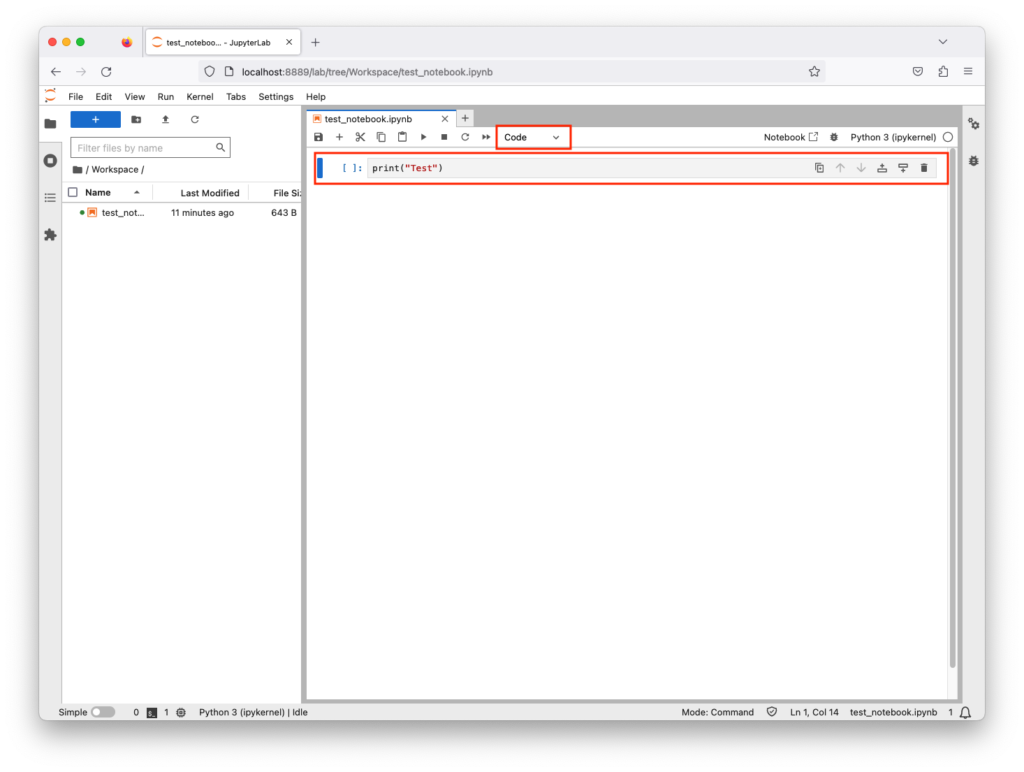
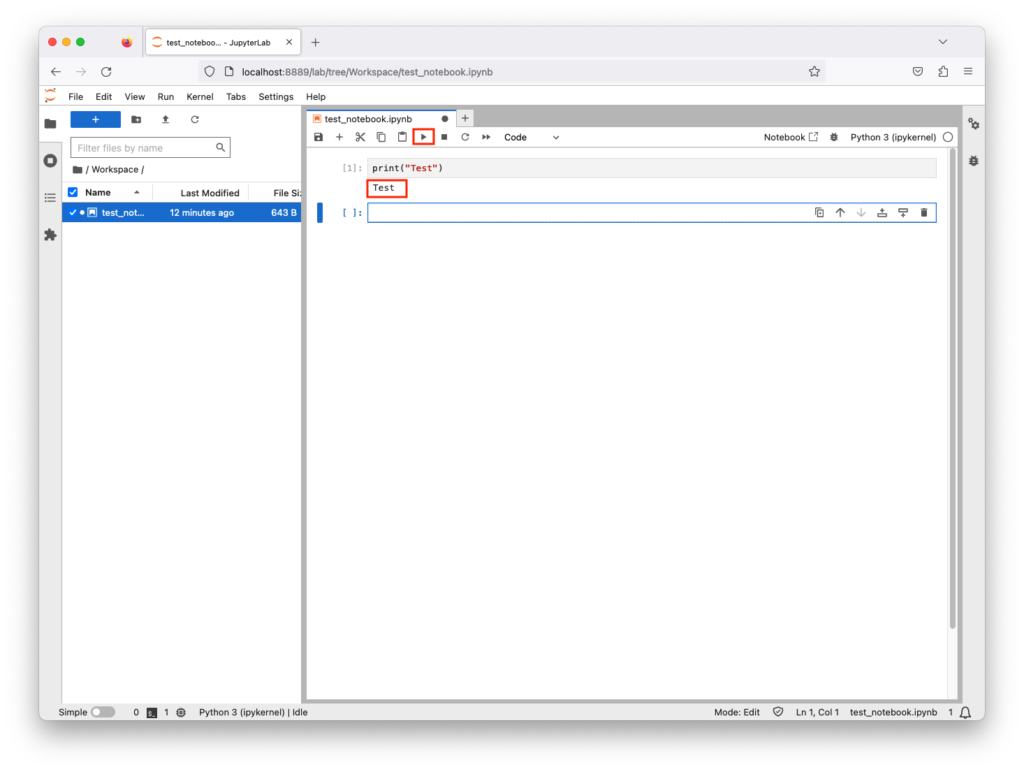
To execute the code, click the play icon; your code will run, and the result is shown in the next line. You can re-execute this block as many times as you want
Magic Commands
Also known as magic functions, these are commands that modify the behavior or code explicitly, extending the notebook’s capabilities. Some of them allow users to escape the Python interpreter. E.g., you can run a shell command and capture its output by using the ! character before the command. This is helpful when the user is limited to the notebook interface.
If you try to the whoami command, it will fail because it will be interrupted as Python code

If you try the whoami command, it will fail because it will be interrupted as Python code
Shutting down JupyterLab
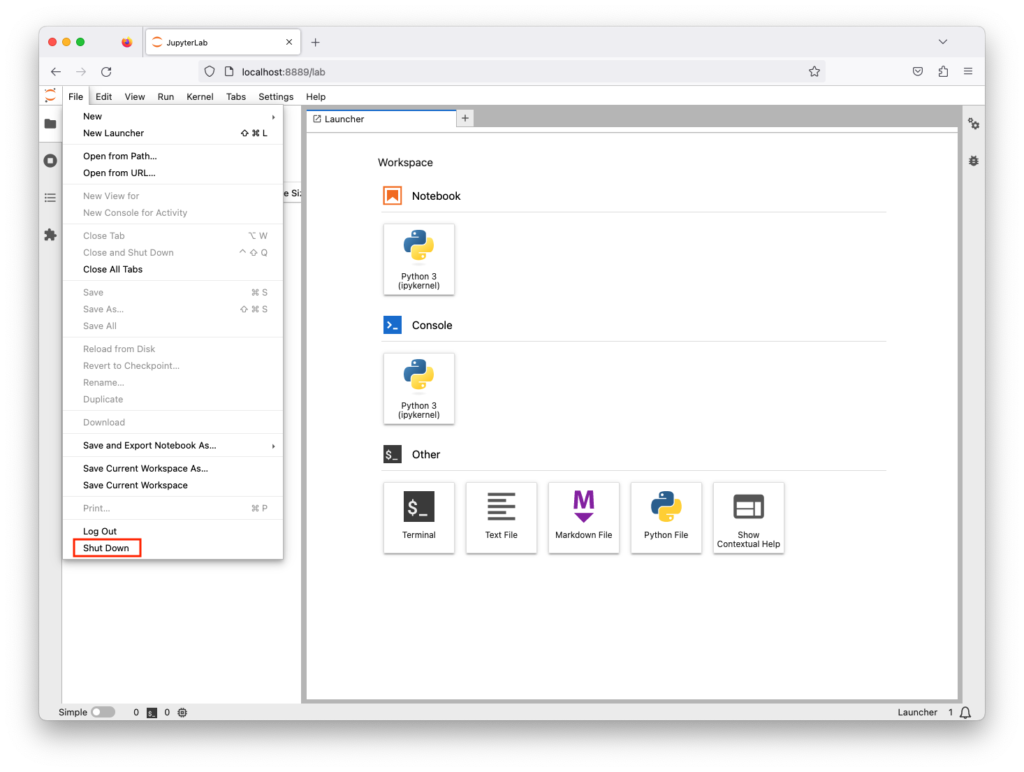
You can shut down the Jupyter lab from the terminal or command line interrupter by using CTRL with C or X. Or, go File, then shutdown
Setting up Password
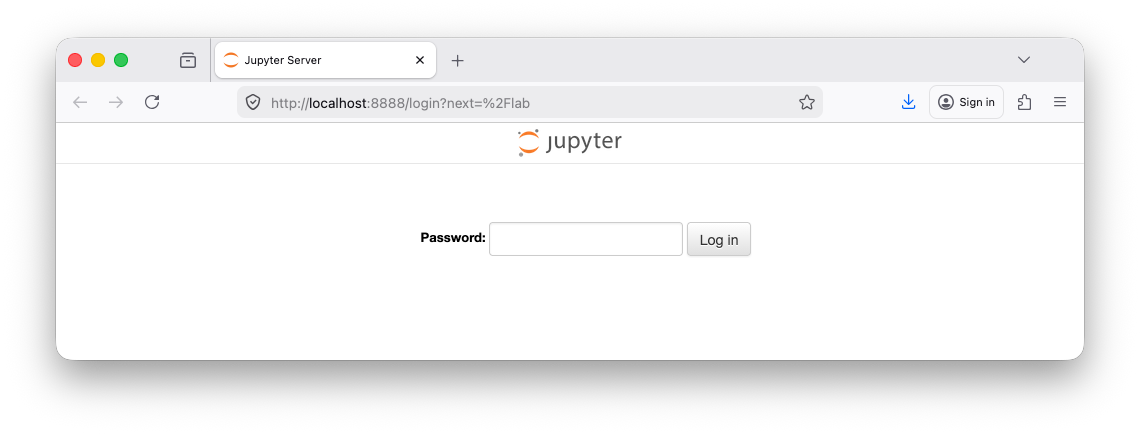
You can configure a password for JupyterLab that must be entered before a user can access the interface, ensuring secure access to the environment
jupyter # Main Jupyter command-line tool
lab # Subcommand to launch the JupyterLab interface
password # Option to setup/change password
(Host) jupyter lab password
Enter password:
Verify password:
[JupyterPasswordApp] Wrote hashed password to /Users/user/.jupyter/jupyter_server_config.json
jupyter # Main Jupyter command-line tool
lab # Subcommand to launch the JupyterLab interface
(Host) jupyter lab
...
...
...
[C 2023-09-23 13:06:53.906 ServerApp]

    To access the server, open this file in a browser:
        file:///Users/pc/Library/Jupyter/runtime/jpserver-5633-open.html
    Or copy and paste one of these URLs:
        http://localhost:8889/lab
        http://127.0.0.1:8889/lab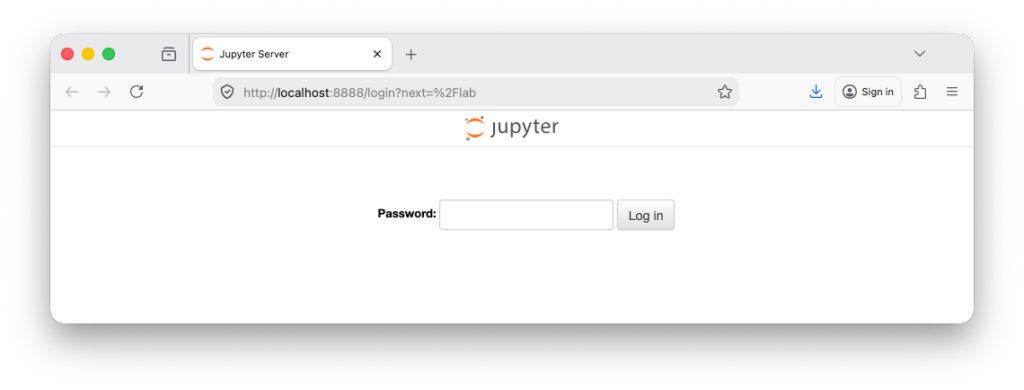
External Modules
The following are some of the external modules used in data analysis and visualization
numpy– a library for large multidimensional arrayspandas– a library for data analysismatplotlib– a library for creating interactive visualizations
Install Modules
You can install all the modules using the install switch in pip3
! # In Jupyter Notebook, ! lets you run shell commands from a cell.
pip # Python’s package manager
install # A command to download and install libraries from PyPI (Python Package Index
numpy # Library for numerical computing, arrays, and matrices.
pandas # Library for data manipulation and analysis, especially tabular data.
matplotlib # Library for creating plots and visualizations in Python.
beautifulsoup4 # Library for parsing HTML and XML, often used in web scraping.
lxml # Library for fast XML and HTML parsing, used by BeautifulSoup for speed and reliability.
selenium # Library for automating web browsers, often used for testing or web scraping dynamic websites.
webdriver-manager # Library to automatically download and manage browser drivers for Selenium, like ChromeDriver or GeckoDriver.
!pip install numpy pandas matplotlib beautifulsoup4 lxml selenium webdriver-managerReview Modules
You can review all installed module using the list switch in pip3
! # In Jupyter Notebook, ! lets you run shell commands from a cell.
pip # Python’s package manager
list # A command to list all installed packages
!pip listRemove Modules
You can remove any module using the uninstall switch in pip3
! # In Jupyter Notebook, ! lets you run shell commands from a cell.
pip # Python’s package manager
list # A command to uninstall a package
xyz # A package to uninstall from the system
!pip uninstall xyz