JupyterHub
JupyterHub is an open-source platform that provides multi-user access to Jupyter Notebook or JupyterLab environments. While JupyterLab or the single-user Jupyter Notebook server is suitable for individual users, JupyterHub is ideal for educational institutions, research groups, or organizations that need multiple users to have their own interactive computing environments on a shared server. Each user gets a personal, isolated instance of a Jupyter Notebook or JupyterLab server, while administrators can centrally manage authentication, resource allocation, and access control.
JupyterHub supports a variety of authentication methods, including OAuth, LDAP, GitHub, and custom systems, making it flexible for different organizational needs. It can be deployed on a single server or scaled across cloud infrastructure or high-performance computing clusters, allowing dozens or even hundreds of users to run notebooks simultaneously.
Security is a critical concern for JupyterHub deployments. Because it exposes interactive coding environments over a network, improper configuration can allow threat actors to exploit vulnerabilities, gain unauthorized access, or use the server for malicious activities, such as launching attacks or mining cryptocurrencies. To mitigate risks, administrators should enforce strong authentication, HTTPS encryption, firewall rules, and regular updates.
Key features of JupyterHub include:
- Multi-user management: Centralized control over multiple notebook instances.
- Customizable environments: Each user can have their own libraries and resources without affecting others.
- Scalability: Can run on local servers, cloud platforms, or containerized systems like Docker or Kubernetes.
- Integration with JupyterLab: Users can work in the modern JupyterLab interface while administrators manage the backend infrastructure.
Overall, JupyterHub provides a secure, scalable, and collaborative platform for teams or classrooms that need interactive computing environments, but it requires careful setup to maintain security and reliability.
Installing JupyterHub on Ubuntu Server
We will be installing JupyterHub in the Ubuntu Server VM. The installation process takes ~5-10 minutes to finish.
- Setup Ubuntu Server in a VM
- Go to the terminal and run
sudo apt install python3 python3-dev git curlcurl -L https://tljh.jupyter.org/bootstrap.py | sudo -E python3 - --admin admin
- Verify that JupyterHub is working by running
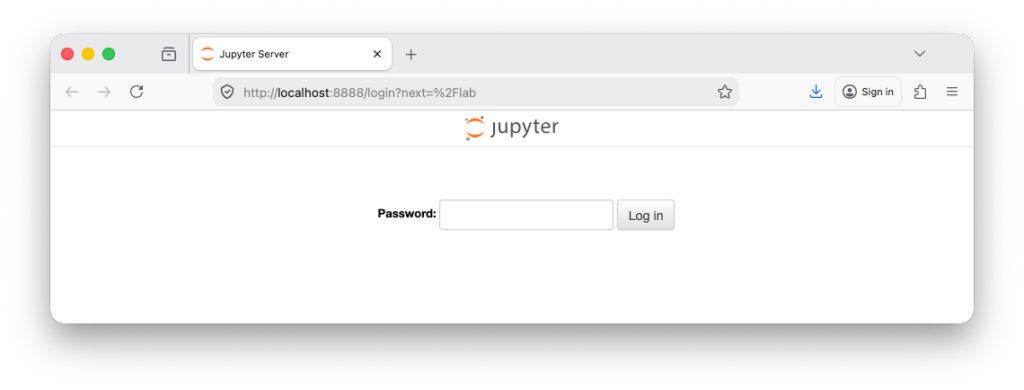
sudo lsof -i :80in the terminal - Go to your web and type 127.0.0.0
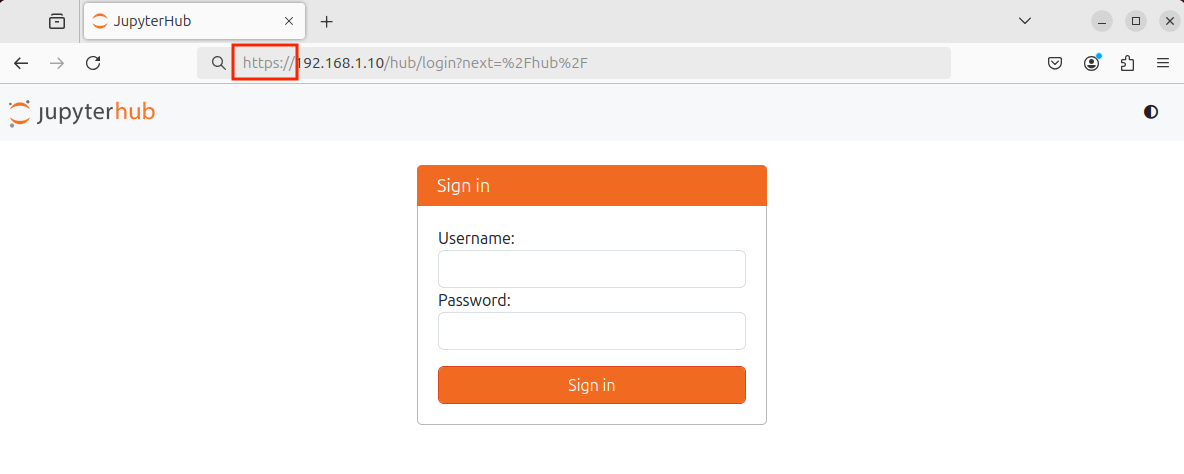
- Enter admin as username and type any strong password you would like to use
Hardening JupyterHub (Latest Software Version)
We installed JupyterHub from the company website using a bootstrap script. In this case, the script will pull the latest version of JupyterHub and install it for us. When installing software, always make sure it comes from a trusted source. If you install software manually, make sure to check its integrity using checksums.
Type server_ip/hub/admin# in the web browser
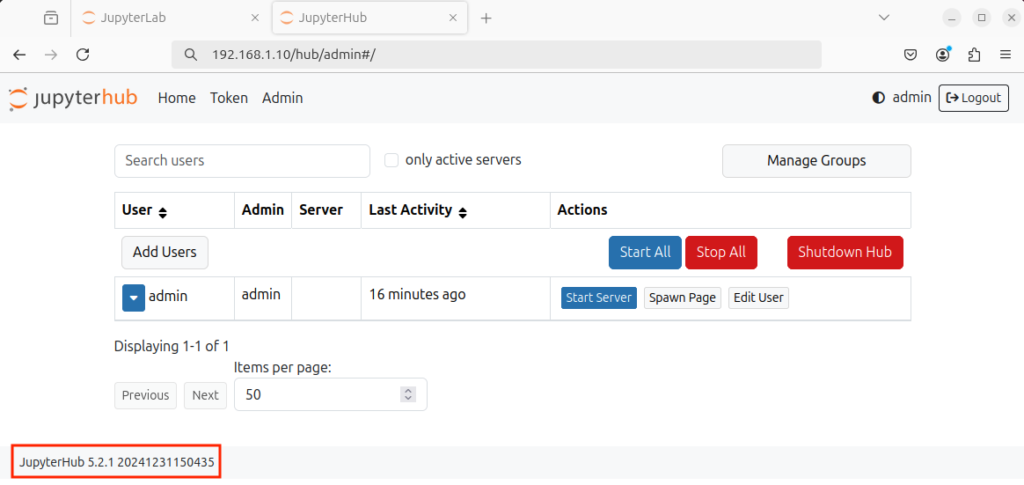
The software version does match the pip website

To update to the latest version, you can run this command in the terminal (Do not run this in JupyterHub)
curl # Command-line tool used to download data from a URL
-L # Tells curl to follow redirects (the URL may redirect to another location
https://tljh.jupyter.org/bootstrap.py # The URL of the bootstrap installer script for
| # pipe, sends the downloaded script directly to another command instead of saving it to a file.
sudo # Runs the next command with administrator (root) privileges, required to install system services and packages.
python3 # Uses the system’s Python 3 interpreter to execute the script
– # Tells Python to read the script from standard input (stdin) (i.e., from the pipe
–version=latest # Argument passed to bootstrap.py, instructing it to install the latest TLJH release
(VM) $ curl -L https://tljh.jupyter.org/bootstrap.py | sudo python3 - --version=latestHardening JupyterHub Server (Change default credentials or adding regular users)
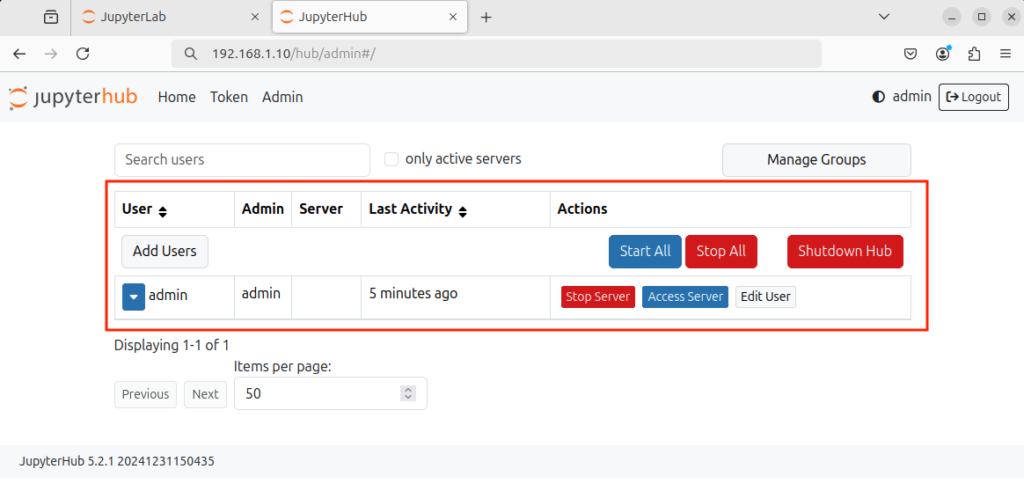
Type server_ip/hub/admin# in the web browser. If you used default usernames and passwords, you can change them from here (Remember, do not use default usernames and passwords in production environments – You can have default credentials in testing environments, but not production environments).
Also, you can manage the users using tljh-config
sudo # Runs the command with administrator (root) privileges, which are required to modify TLJH configuration.
tljh-config # The configuration management tool for The Littlest JupyterHub (TLJH). It is used to view and change JupyterHub settings in a safe, structured way.
add-item # A subcommand that adds a value to a list-type configuration setting.
users.admin # The configuration key that stores the list of JupyterHub admin users.
<username> # The Linux/JupyterHub username you want to grant admin privileges to (Replace this with the actual username.
(VM) $ sudo tljh-config add-item users.admin <username>sudo # Runs the command with administrator (root) privileges, which are required to modify TLJH configuration.
tljh-config # The configuration management tool for The Littlest JupyterHub (TLJH). It is used to view and change JupyterHub settings in a safe, structured way.
reload # Applies configuration changes by restarting/reloading JupyterHub services.
(VM) $ sudo tljh-config reloadOr, you can delete a use
sudo # Runs the command with administrator (root) privileges, which are required to modify TLJH configuration.
tljh-config # The configuration management tool for The Littlest JupyterHub (TLJH). It is used to view and change JupyterHub settings in a safe, structured way.
add-item # A subcommand that adds a value to a list-type configuration setting.
users.admin # The configuration key that stores the list of JupyterHub admin users.
<username> # The Linux/JupyterHub username you want to delete (Replace this with the actual username.
(VM) $ sudo tljh-config remove-item users.admin <username>sudo # Runs the command with administrator (root) privileges, which are required to modify TLJH configuration.
tljh-config # The configuration management tool for The Littlest JupyterHub (TLJH). It is used to view and change JupyterHub settings in a safe, structured way.
reload # Applies configuration changes by restarting/reloading JupyterHub services.
(VM) $ sudo tljh-config reloadHardening JupyterHub (Disabling Features)
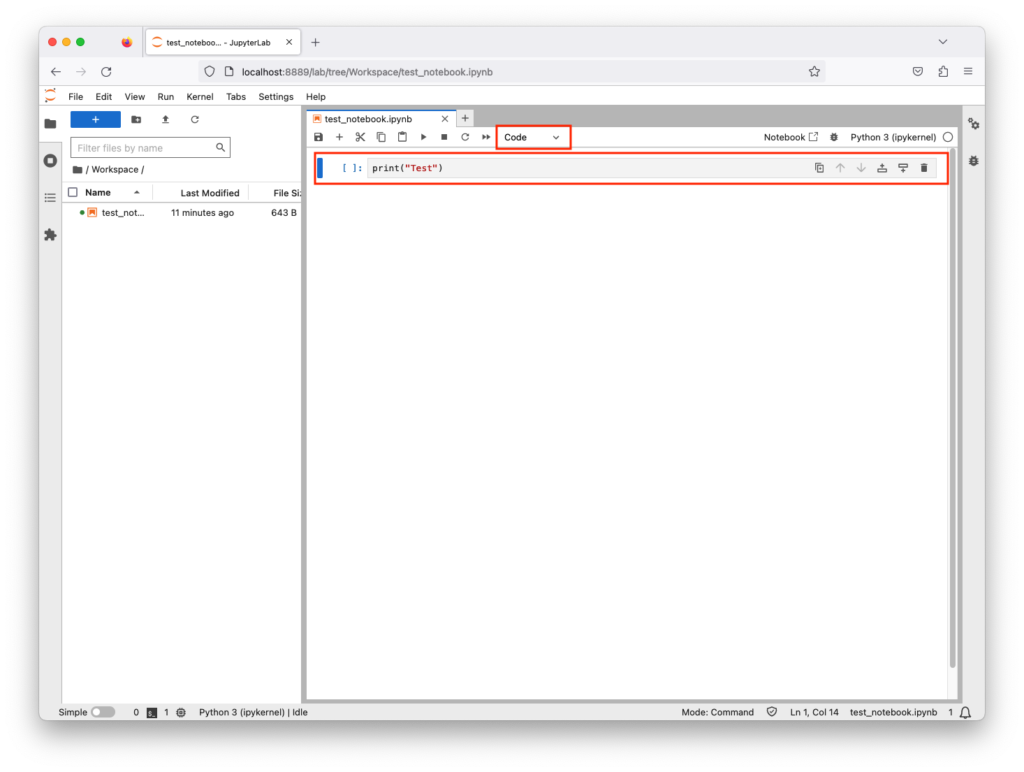
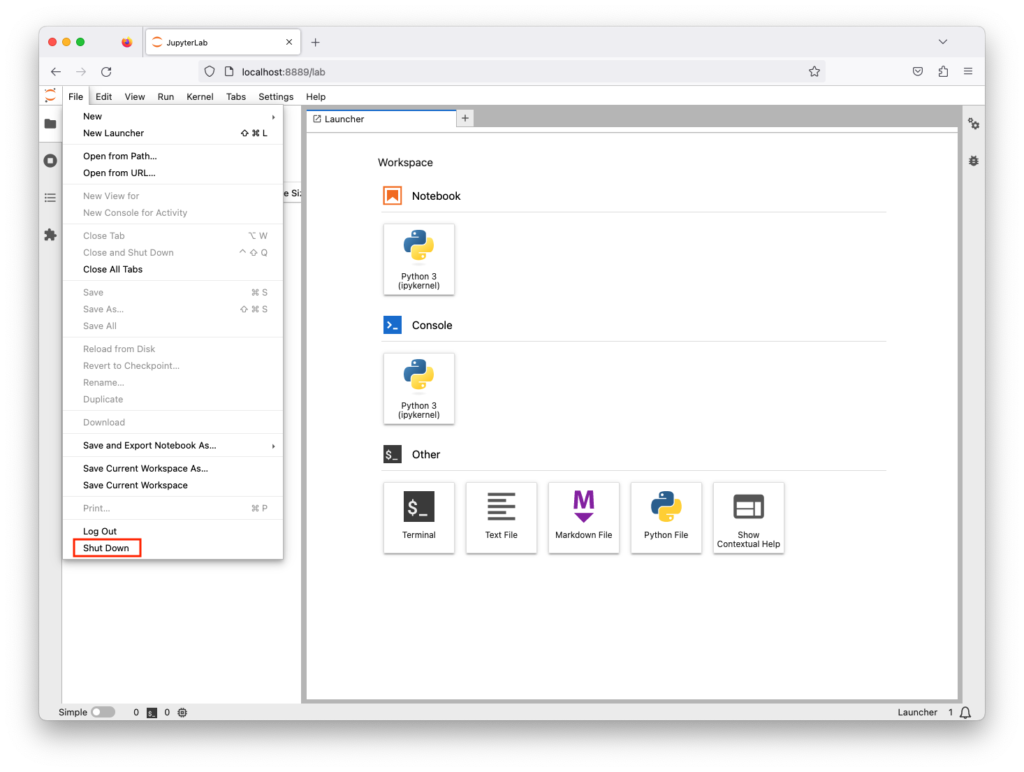
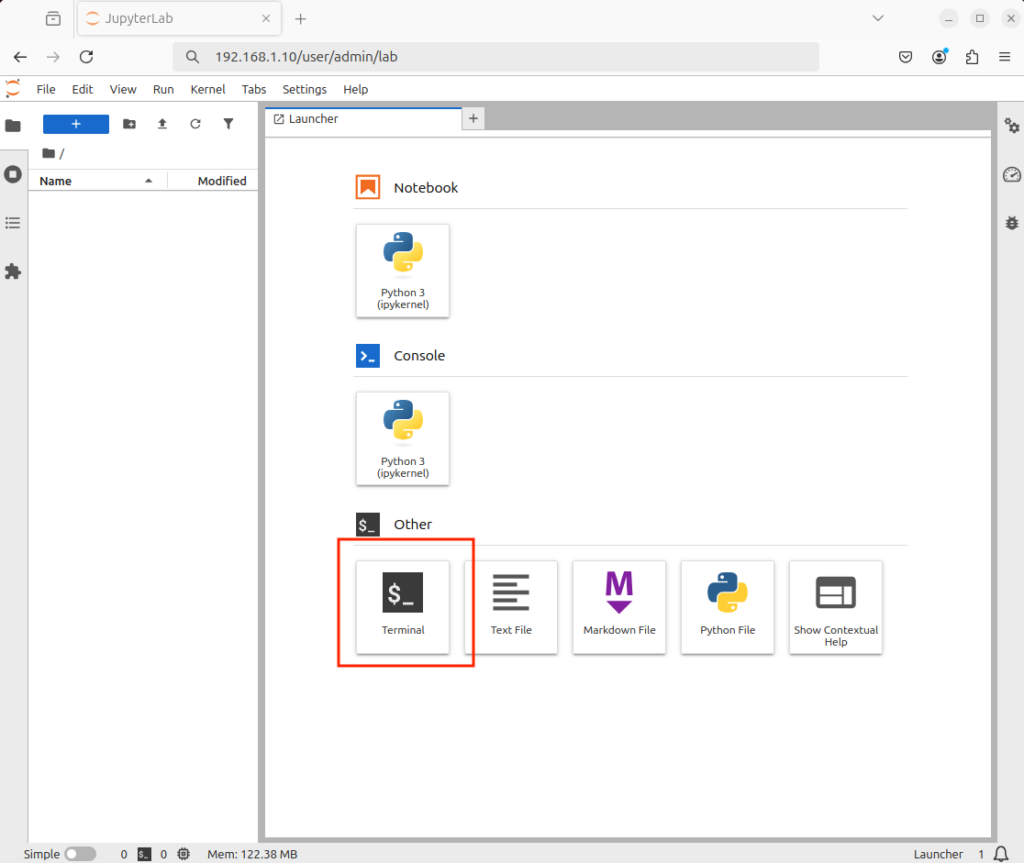
To disable accessing the terminal (This does not disable magic commands – threat actors can still utilize magic commands)
Generate jupyter_notebook_config.py and move it to /opt/tljh/user/etc/jupyter
/opt/tljh/user/bin/jupyter # The Jupyter executable from TLJH’s user Python environment (not the system Python).
notebook # Runs the classic Jupyter Notebook application (not JupyterLab).
–generate-config # Tells Jupyter to create a default configuration file and then exit.
(VM) $ /opt/tljh/user/bin/jupyter notebook --generate-config
Writing default config to: /home/<change this to the current username>/.jupyter/jupyter_notebook_config.py
sudo # Runs the command with administrator (root) privileges because you are moving a file into a system-managed directory.
mv # The Linux command to move or rename files.
/home/<username>/.jupyter/jupyter_notebook_config.py # The source file: a Jupyter Notebook configuration file generated earlier.
/opt/tljh/<username>/etc/jupyter/ # The destination directory for TLJH-managed Jupyter configuration.
(VM) $ sudo mv /home/test/.jupyter/jupyter_notebook_config.py /opt/tljh/user/etc/jupyter/After that, change the #c.ServerApp.terminals_enabled = False to c.ServerApp.terminals_enabled = False in the copied file /opt/tljh/user/etc/jupyter/jupyter_notebook_config.py
sudo # Runs the command with administrator (root) privileges because you are moving a file into a system-managed directory.
nano # A simple command-line text editor in Linux.
/opt/tljh/user/etc/jupyter/jupyter_notebook_config.py # The system-wide Jupyter Notebook configuration file for TLJH
(VM) $ sudo nano /opt/tljh/user/etc/jupyter/jupyter_notebook_config.pyReload JupyterHub
sudo # Runs the command with administrator (root) privileges, which are required to modify TLJH configuration.
tljh-config # The configuration management tool for The Littlest JupyterHub (TLJH). It is used to view and change JupyterHub settings in a safe, structured way.
reload # Applies configuration changes by restarting/reloading JupyterHub services.
(VM) $ sudo tljh-config reloadNow, the terminal is removed
Hardening JupyterHub (Enabling HTTPS)
We will be using a self-signed cert for HTTPS using the openssl command
mkdir # Linux command to create a new directory – folder).
/etc/https # The path for the new directory you want to create.
(VM) $ mkdir /etc/httpscd # Linux command to change the current directory in the terminal.
/etc/https # The path to the directory you want to switch to.
(VM) $ cd /etc/httpssudo # Runs the command with administrator privileges, necessary because you’re creating files in a system directory (/etc/https)
openssl # The OpenSSL tool, used to generate SSL/TLS certificates, keys, and handle encryption.
req # Command to create a certificate signing request (CSR) or self-signed certificate.
-x509 # Creates a self-signed certificate instead of generating a CSR to send to a certificate authority.
-newkey rsa:4096 # Generates a new RSA key pair with 4096-bit encryption.
-keyout key.pem # Specifies the filename for the private key.
-out cert.pem # Specifies the filename for the certificate itself.
-sha256 # Uses the SHA-256 hash algorithm for signing the certificate.
-days 3650 # Sets the certificate validity to 3650 days (~10 years).
-nodes # Stands for “no DES” — the private key will not be encrypted with a passphrase. Needed for services that start automatically, like JupyterHub, so you don’t have to type a password on startup.
-subj “/C=US/ST=Washington/L=Vancover/O=CompanyName/OU=CompanySectionName/CN=CommonNameOrHostname” # Provides certificate details in a single line, C: Country (US), ST: State (Washington), L: City (Vancover), O: Organization (CompanyName), OU: Organizational Unit (CompanySectionName), CN: Common Name or Hostname (e.g., example.com or your server IP))
(VM) $ sudo openssl req -x509 -newkey rsa:4096 -keyout key.pem -out cert.pem -sha256 -days 3650 -nodes -subj "/C=US/ST=Washington/L=Vancover/O=CompanyName/OU=CompanySectionName/CN=CommonNameOrHostname"sudo # Runs the command with administrator privileges. Needed because /etc/https is a system directory.
chown # Linux command to change the ownership of files and directories.
root # Specifies the new owner.
-R # Stands for recursive. Applies the ownership change to all files and subdirectories inside /etc/https.
/etc/https # The directory to change ownership for and everything inside it).
(VM) $ sudo chown root -R /etc/httpssudo # Runs the command with administrator privileges because /etc/https is a system directory.
chmod # Linux command to change file permissions.
0600 # Permission mode in octal format. Only root can read/write the files; nobody else can access them: Owner (root) → read & write (6), Group → no permissions (0), Others → no permissions (0)
-R # Stands for recursive. Applies permissions to all files and subdirectories under /etc/https.
/etc/https # The directory being modified, containing your SSL certificate and private key
(VM) $ sudo chmod 0600 -R /etc/httpssudo # Runs the command with administrator (root) privileges, which are required to modify TLJH configuration.
tljh-config # The configuration management tool for The Littlest JupyterHub (TLJH). It is used to view and change JupyterHub settings in a safe, structured way.
set # A subcommand that sets a configuration key to a specific value.
https.tls.key # The configuration key specifying the path to the TLS private key for HTTPS.
/etc/https/key.pem # The path to the private key file you generated earlier. This file must be readable by root, which it is, because of chmod 600
(VM) $ sudo tljh-config set https.tls.key /etc/https/key.pemsudo # Runs the command with administrator (root) privileges, which are required to modify TLJH configuration.
tljh-config # The configuration management tool for The Littlest JupyterHub (TLJH). It is used to view and change JupyterHub settings in a safe, structured way.
set # A subcommand that sets a configuration key to a specific value.
https.tls.cert # The configuration key specifying the path to the TLS certificate for HTTPS
/etc/https/cert.pem # The path to your SSL certificate file you generated earlier. This file must be readable by root, which it is, because of chmod 600
(VM) $ sudo tljh-config set https.tls.cert /etc/https/cert.pemsudo # Runs the command with administrator (root) privileges, which are required to modify TLJH configuration.
tljh-config # The configuration management tool for The Littlest JupyterHub (TLJH). It is used to view and change JupyterHub settings in a safe, structured way.
set # A subcommand that sets a configuration key to a specific value.
https.enabled # The TLJH configuration key that turns HTTPS on or off
true # Sets the value of https.enabled to true, enabling HTTPS for JupyterHub
(VM) $ sudo tljh-config set https.enabled truesudo # Runs the command with administrator (root) privileges, which are required to modify TLJH configuration.
tljh-config # The configuration management tool for The Littlest JupyterHub (TLJH). It is used to view and change JupyterHub settings in a safe, structured way.
reload # Applies configuration changes by restarting/reloading JupyterHub services.
proxy # Specifies that only the reverse proxy service should be reloaded
(VM) $ sudo tljh-config reload proxyType the IP address of the JupyterHub Server and create an exception for the self-signed certification